Picking an Actag Family
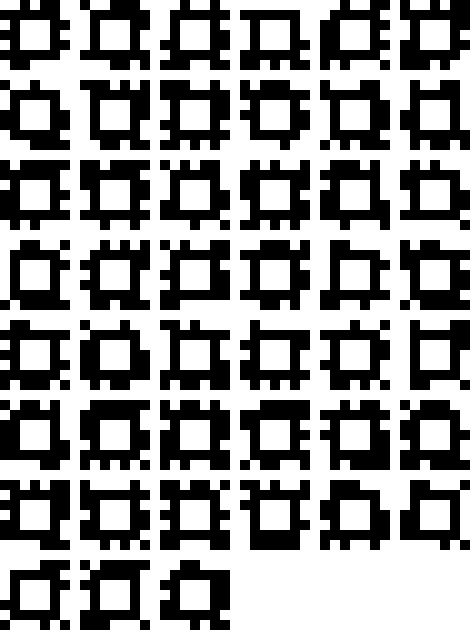
In order to use AcTags, you will need to pick an AcTag family to work with. An AcTag family consists of multiple AcTags, each with a unique layout of data bits and tag IDs. The data bits allow the tag id of each tag to be decoded, and differentiates each individual tag from other tags in the family. For example, below is the entirety of the AcTag24h8 family, which contains 45 AcTags. The tag in the top-left corner has a tag id of #0, followed by tag #1 to its right, and so on:
The number of data bits in an AcTag family can be specified, as well as the minimum hamming distance between all of the tags in a family. The name of the AcTag family will depend on the value of these parameters. For example, an AcTag family with a data bit value of 24 and a minimum hamming distance value of 10 would be called AcTag24h10.
If you have no specific requirements in mind, we recommend that you use one of the Included AcTag families. Otherwise, see Generating Custom AcTag Families for information on the customizable parameters of an AcTag family and how to generate one for your specific application.
Included AcTag Families
This repository comes with four AcTag families included and ready for detection with the AcTag class. These are:
AcTag24h4with 2591 tagsAcTag24h6with 453 tagsAcTag24h8with 45 tagsAcTag24h10with 7 tags
To see images of the tags in these families, please refer to the “actag_families/images_files/” folder. To detect these families with the AcTag class, simply pass the corresponding family name as the tag_family parameter. For more information on detecting these families in sonar or camera imagery, see Detecting AcTags.
Generating Custom AcTag families
Prerequisites
All instructions provided are for use with a Linux OS. First, update all of your packages with the following command:
sudo apt update
You will also need to install the following packages. Note that the setup provided here has only been tested on Ubuntu 20.04. You may need to install further libraries depending on your system:
sudo apt install -y ant default-jdk
Finally, install the actag repository onto your own computer.
How to Generate Custom AcTag Families
To generate your desired AcTag family, run the following command in the actag_families folder:
./generateAcTags.sh -d <Data bits> -h <Minimum hamming distance> [-i]
The parameters are as follows:
Data bits: The number of data bits for this tag family. This value must be equal to i*4, where i is an integer >= 4. A higher number of data bits correlates with:A larger number of tags in the family.
Less false positive detections.
Less true positive detections as a result of smaller data bits.
A higher possible minimum hamming distance.
Minimum hamming distance: The minimum number of data bits that can be flipped to find another tag in the family. This value must be an integer >= 1. The number of bit corrections allowed during AprilTag or AcTag detection can be specified by the user, but it must be less than half of the minimum hamming distance. Therefore, a higher minimum hamming distance allows for more bit corrections. A higher number of bit corrections correlates with:Significantly more true positive detections.
Slightly more false positive detections.
-i: If set, this will generate image files for the specified family into the image_files folder.Note: If you are using WSL, this will not work unless you have a display server like XLaunch running.
The generated images will be very small, so if you want them bigger, you’ll need to rescale them. To do so, you may use the following command:
$ convert <small_marker>.png -scale <scale_chosen_in_percent>% <big_marker>.png
When the generation script terminates, your new custom AcTag family will be ready to use. The .java file will be found in the “python/actag/generated_families/” folder, and the image files can be found in the “actag_families/image_files/” folder. Finally, the C files for use with apriltag will be located in the “actag_families/actag_files_for_apriltag/” folder.
To use your new family, pass the file path of your new AcTag family Java file to the tag_family parameter of the AcTag class. For more information on detecting your AcTag families in sonar or camera imagery, see Detecting AcTags.
Example Usage
To generate the AcTag24h10 family:
$ sh generateAcTags.sh -d 24 -h 10
To generate an AcTag family with 16 data bits and a minimum hamming distance of 7:
$ sh generateAcTags.sh -d 16 -h 7
To generate the AcTag28h6 family with the corresponding images:
$ sh generateAcTags.sh -d 28 -h 6 -i